

If you are searching for how to fix a leaking faucet, you may be relieved to know that many faucet leaks are simple enough to repair yourself. A dripping faucet is annoying, wastes water, and can sometimes cause stains or damage around the sink. In many cases, the problem is simply a worn washer, damaged O-ring, loose connection, or faulty cartridge.
The important thing is not to start taking everything apart before you know where the water is coming from. First, identify the type of faucet and the exact location of the leak. Once you know the cause, you can replace the damaged part and put everything back together.
This detailed guide will walk you through the process from beginning to end, including the tools you need, common faucet types, different kinds of leaks, and situations where you should call a professional.
Why Is My Faucet Leaking?
Before learning how to fix a leaking faucet, you should understand why faucets usually start leaking.
A faucet contains several moving and sealing parts. These parts are exposed to water every day, so they can eventually wear out.
Common causes include:
- Worn-out washers
- Damaged O-rings
- Faulty cartridges
- Worn valve seats
- Loose screws or nuts
- Damaged seals or gaskets
- Corrosion
- Mineral deposits
- High water pressure
- Loose supply connections
- Cracked faucet components
The location of the water can give you an important clue about the problem.
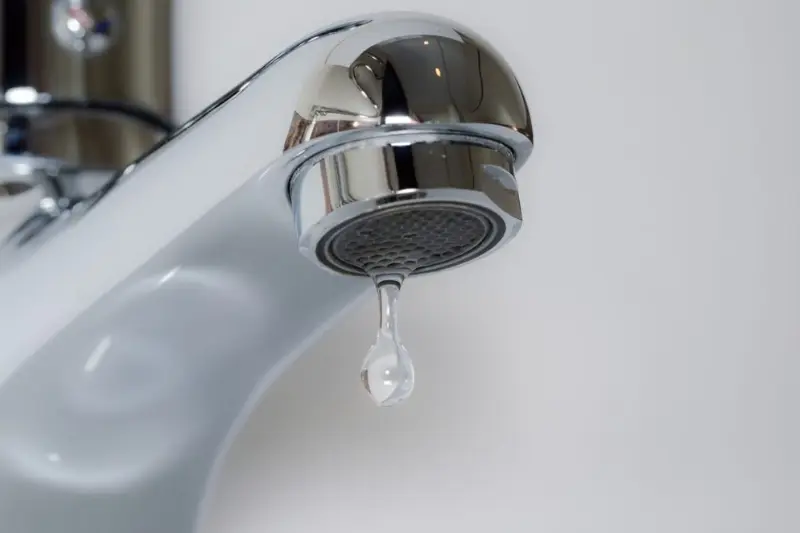
For example, if water continues dripping from the spout after you turn the faucet off, an internal valve, washer, or cartridge may be responsible. If water appears around the handle, an O-ring, cartridge seal, or other internal component may be worn.
If water is coming from underneath the sink, the supply connection or another plumbing component may be leaking.
Different Types of Faucet Leaks
Not every leak should be repaired in exactly the same way. Start by determining where your faucet is leaking.
1. Water Dripping From the Spout
This is one of the most common faucet problems.
You turn the faucet off, but water continues to drip from the spout. The cause can include:
- Worn washer
- Damaged cartridge
- Faulty valve
- Damaged valve seat
- Mineral buildup
The repair depends on the type of faucet.
2. Water Leaking Around the Handle
If water appears around the handle when you turn the faucet on, the problem may be an O-ring, cartridge seal, or loose component.
You may need to remove the handle to inspect the internal parts.
3. Water Leaking Around the Base
Water collecting around the base of the faucet can indicate:
- A damaged gasket
- Worn O-ring
- Loose mounting hardware
- Mineral buildup
- Damaged seal
You may need to inspect both the top and underside of the sink.
4. Water Leaking Under the Sink
If the cabinet underneath your sink is getting wet, check the supply lines and connections.
Possible causes include:
- Loose supply connection
- Damaged flexible hose
- Faulty shut-off valve
- Leaking faucet connection
- Corroded plumbing component
Do not ignore an under-sink leak because continued moisture can damage cabinets and surrounding materials.
Tools You May Need
You usually don’t need professional plumbing equipment to repair a basic faucet.
Keep these tools nearby:
- Adjustable wrench
- Phillips screwdriver
- Flat-head screwdriver
- Allen key set
- Adjustable pliers
- Small bucket
- Towel or cloth
- Replacement washer
- Replacement O-rings
- Replacement cartridge
- Plumber’s tape where appropriate
- Flashlight
You may not need every tool on this list. The exact tools depend on your faucet design.
Buy the Correct Replacement Parts
One of the biggest mistakes people make when repairing a faucet is buying a replacement part that looks similar but is not the correct size or model.
Before purchasing a replacement:
- Identify your faucet brand and model if possible.
- Remove the damaged component if practical.
- Take the old part with you when shopping.
- Compare its size and shape with the replacement.
- Follow the manufacturer’s instructions when available.
A cartridge, washer, or O-ring that is slightly different may not seal correctly.
Step 1: Turn Off the Water Supply
The first and most important step is to turn off the water.
Look underneath your sink. You will usually find one or two small shut-off valves connected to the water supply lines.
Turn the appropriate valve clockwise to shut off the water.
If your faucet has separate hot and cold supplies, close both valves.
Once the valves are closed, turn the faucet on.
Let the water run for a few seconds. This releases pressure from the faucet and confirms that the water supply has been shut off.
What If There Is No Shut-Off Valve?
If you cannot find a local shut-off valve, you may need to shut off the main water supply to the property.
If you are unsure which valve controls the faucet, avoid randomly turning valves that you do not recognize.
Step 2: Protect the Sink and Drain
Before removing small screws or faucet parts, put a towel over the drain.
This is a simple step, but it can save you a lot of frustration.
Small screws and clips can easily fall down the drain.
You can also place a towel or small bucket underneath the sink to catch water that remains inside the supply line.
Step 3: Identify Your Faucet Type
The repair method depends heavily on the faucet design.
Common types include:
- Compression faucets
- Cartridge faucets
- Ball faucets
- Ceramic-disk faucets
Let’s look at each one.
How to Fix a Leaking Compression Faucet
Compression faucets are generally recognizable because they often have separate hot and cold handles.
They use a rubber washer that presses against a valve seat to control water flow.
If the washer becomes worn, water can continue dripping from the spout even when the handle is closed.
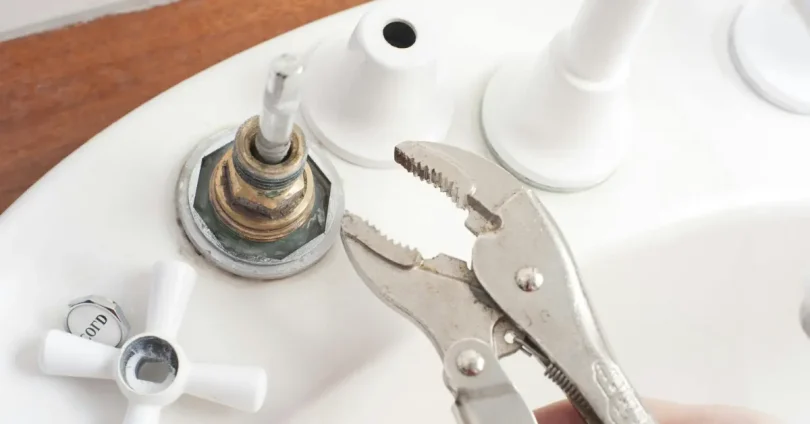
Remove the Handle
Look for the screw holding the handle in place.
The screw may be hidden under a decorative cap.
Carefully remove the cap if necessary, then remove the screw.
Lift the handle away from the faucet.
If the handle is stuck, don’t immediately use excessive force. Mineral deposits and corrosion can make old handles difficult to remove.
Remove the Packing Nut
Once the handle is removed, you should see a nut holding the valve stem in place.
Use an adjustable wrench to loosen the nut.
Turn it carefully and avoid damaging the faucet body.
Remove the Old Washer
Take out the valve stem and locate the rubber washer.
Inspect it carefully.
A worn washer may appear:
- Cracked
- Flattened
- Hard
- Brittle
- Torn
- Deformed
If the washer is damaged, replace it with the correct size.
Install the New Washer
Place the new washer in the correct position.
Make sure it sits flat and securely.
Reinstall the valve stem and tighten the retaining nut.
Then put the handle back in place.
Turn the water supply on slowly and test the faucet.
You may also like to read this:
How To Fix A Leaking Pipe: Easy Step-By-Step Guide
How To Stop Water Pipe Leaks: Easy Repair Guide
How to Find Water Leaks: Easy Tips To Detect Hidden Leaks
Pipe Leak Repair Tips: Easy Ways To Fix Leaking Pipes
How to Fix a Leaking Cartridge Faucet
Cartridge faucets are also very common.
They usually have one handle that moves up and down and sometimes from side to side.
A leaking cartridge faucet may require replacement of the entire cartridge.
Remove the Handle
First, turn off the water.
Look for a small retaining screw on the handle. It may be located underneath a decorative cap or on the side.
Remove the screw and lift the handle away.
Remove the Retaining Clip or Nut
Underneath the handle, you may find a retaining nut or clip holding the cartridge in place.
Remove it carefully.
Keep small parts in a safe place so you know where they go during reassembly.
Remove the Cartridge
Pull the cartridge straight out if possible.
Some cartridges can be difficult to remove because of mineral buildup or age.
If the cartridge is stuck, avoid damaging the faucet body while trying to remove it.
Install the Replacement Cartridge
Compare the old cartridge with the new one.
Make sure the new cartridge has the same size and configuration.
Install it in the correct orientation.
Then reinstall the retaining clip or nut.
Put the handle back on and secure it with the screw.
Turn the water supply back on slowly.
Check the faucet for leaks.
How to Fix a Leaking Ball Faucet
Ball faucets usually have a single handle that moves in different directions.
Inside the faucet is a rounded ball mechanism along with several seals and springs.
If this type of faucet leaks, the problem may involve:
- Worn seals
- Damaged springs
- Worn ball
- Damaged O-rings
- Mineral deposits
A repair kit may contain several replacement components.
Because ball faucets can have multiple small parts, carefully note where each component goes as you remove it.
If the internal ball is damaged or the faucet is badly corroded, replacing the faucet may be more practical than repairing individual components.
How to Fix a Leaking Ceramic-Disk Faucet
Ceramic-disk faucets use ceramic discs to control water flow.
They are generally durable, but they can still develop leaks.
If a ceramic-disk faucet is leaking, the problem may be caused by:
- Damaged seals
- Mineral buildup
- Worn components
- Damaged ceramic discs
Because ceramic components can be delicate, avoid using excessive force.
If cleaning and replacing seals does not solve the problem, the cartridge or faucet assembly may need professional attention.
How to Replace a Faucet O-Ring
An O-ring is a small rubber ring that creates a watertight seal.
O-rings can become:
- Dry
- Cracked
- Flattened
- Stretched
- Brittle
If water is leaking around the handle or faucet base, an O-ring may be responsible.
Remove the old O-ring carefully.
Clean the groove where the O-ring sits.
Install a replacement O-ring of the correct size.
Make sure it sits evenly without twisting.
Then reassemble the faucet and test it.
How to Fix a Leak Around the Faucet Base
If water is collecting around the base of your faucet, start by drying the area completely.
Turn the faucet on and observe where the water first appears.
If the leak comes from the faucet base, inspect the mounting area.
The faucet may have a gasket or seal underneath it.
Check the mounting hardware underneath the sink. If it is loose, carefully tighten it.
Don’t overtighten it. Excessive force can damage the faucet, sink, or mounting hardware.
If the gasket is damaged, replace it.
How to Fix a Faucet Supply Line Leak
Sometimes the faucet itself is not the problem.
The leak may come from the flexible water supply line underneath the sink.
Dry the connection completely.
Then turn the water supply on slowly and watch the connection.
If water appears around the connection, carefully tighten it.
If the hose itself is damaged, cracked, or corroded, replace the hose.
Do not continue using a visibly damaged supply line because it can fail suddenly and release a large amount of water.
What to Do If the Faucet Is Still Leaking
If you have replaced a washer or cartridge and the faucet continues to drip, don’t immediately replace the same part again.
Check these possibilities:
Check the Replacement Part
Make sure the replacement is the correct model and size.
Check the Installation
A washer, cartridge, or O-ring that isn’t seated correctly may allow water to pass.
Look for Mineral Deposits
Mineral buildup can prevent internal components from creating a proper seal.
Inspect for Corrosion
Severe corrosion can prevent parts from fitting correctly.
Check the Faucet Body
If the faucet body itself is cracked, replacing internal components will not solve the problem.
How to Test Your Faucet After Repair
Testing is an important part of learning how to fix a leaking faucet properly.
Once everything is assembled:
- Make sure the faucet handle is in the off position.
- Open the water supply valve slowly.
- Watch the faucet carefully.
- Turn the faucet on and off several times.
- Check the spout for dripping.
- Check around the handle.
- Check around the faucet base.
- Look underneath the sink.
- Dry the connections and check them again after a few minutes.
If everything remains dry and the spout stops dripping, the repair was successful.
Common Mistakes to Avoid
When repairing a leaking faucet, a few simple mistakes can make the problem worse.
Don’t Skip the Water Shut-Off
Never start removing internal faucet components while the water supply is still active.
Don’t Overtighten Parts
More tightening does not always mean a better seal.
Overtightening can damage threads, seals, nuts, and faucet bodies.
Don’t Force Stuck Parts
Older faucets can become difficult to disassemble because of corrosion or mineral deposits.
Using too much force can break the faucet.
Don’t Reuse Damaged Seals
If a washer or O-ring is cracked or badly worn, replace it.
Reusing damaged sealing components is unlikely to provide a reliable repair.
Don’t Ignore Under-Sink Water
Even a small amount of water underneath the sink can eventually cause damage.
Find the source and repair it as soon as possible.
When Should You Replace the Faucet?
Sometimes repairing the faucet isn’t the most practical option.
Consider replacing the faucet if:
- The faucet body is cracked.
- There is extensive corrosion.
- Replacement parts are difficult to find.
- Multiple components are failing.
- The faucet is very old.
- Repairing it would cost nearly as much as replacement.
- The faucet continues leaking after proper repairs.
A new faucet can also make sense if the existing one has become difficult to operate or has repeated problems.
How to Prevent Future Faucet Leaks
Once you’ve learned how to fix a leaking faucet, you can take a few steps to reduce the chance of another leak.
Avoid Excessive Force
Turn handles gently instead of forcing them closed.
Clean Mineral Deposits
Hard-water deposits can interfere with seals and moving components.
Check Connections Regularly
Every few months, look underneath the sink for moisture, corrosion, or damaged hoses.
Repair Small Problems Early
A small drip can be easier to repair than a major leak that has been ignored for months.
Don’t Use Damaged Parts
Replace worn washers, O-rings, cartridges, and hoses when necessary.
How Much Water Can a Dripping Faucet Waste?
Even a small drip means water is continuously leaving your plumbing system.
The exact amount depends on the size and frequency of the drip. A faster leak can waste considerably more water than a slow occasional drip.
Fixing the problem promptly can therefore help reduce unnecessary water consumption and prevent moisture damage around your sink.
Frequently Asked Questions
Can I fix a leaking faucet myself?
Yes. Many common faucet leaks can be repaired with basic tools and replacement parts. The difficulty depends on the faucet type and the cause of the leak.
Why does my faucet drip after I turn it off?
A dripping faucet may have a worn washer, cartridge, valve, seal, or another internal component that is no longer creating a proper watertight seal.
Do I need to replace the entire faucet?
Not necessarily. If only a washer, O-ring, cartridge, or seal is damaged, replacing that component may solve the problem. However, a cracked or severely corroded faucet may need replacement.
Why is my faucet leaking from the handle?
A leak around the handle can be caused by a damaged O-ring, cartridge, seal, or loose internal component. Removing the handle allows you to inspect the parts underneath.
Why is water leaking underneath my sink?
The source could be a faucet connection, supply hose, shut-off valve, or another plumbing component. Dry the area and carefully observe where fresh water appears.
Final Thoughts
Learning how to fix a leaking faucet becomes much easier when you first identify exactly where the water is coming from. Start by shutting off the water supply, protecting the drain, and determining what type of faucet you have. From there, inspect the washer, cartridge, O-rings, seals, and connections for damage or wear.
For a simple dripping faucet, replacing one inexpensive component may be all you need. Take your time, keep track of the parts you remove, and always test the faucet carefully after putting it back together.
If the faucet is badly corroded, the plumbing is damaged, or the source of the leak is unclear, getting help from a qualified plumber can prevent a small repair from becoming a much bigger plumbing problem.


[…] How To Fix A Leaking Faucet: Easy DIY Repair Guide […]
[…] You may also like to read this:How To Fix A Leaking Faucet: Easy DIY Repair Guide […]